Creating Dynamic Experiences
Perform the following steps to create a new Dynamic Experience for social proof:
-
Log into Omnichannel Personalization.
-
On the Omnichannel Personalization Dashboard page, go to Content > Dynamic Experiences.
-
Click + Add.
The Create experience page is displayed.

-
On the Create experience page, perform the following crucial steps to complete the creation of a new dynamic experience.
-
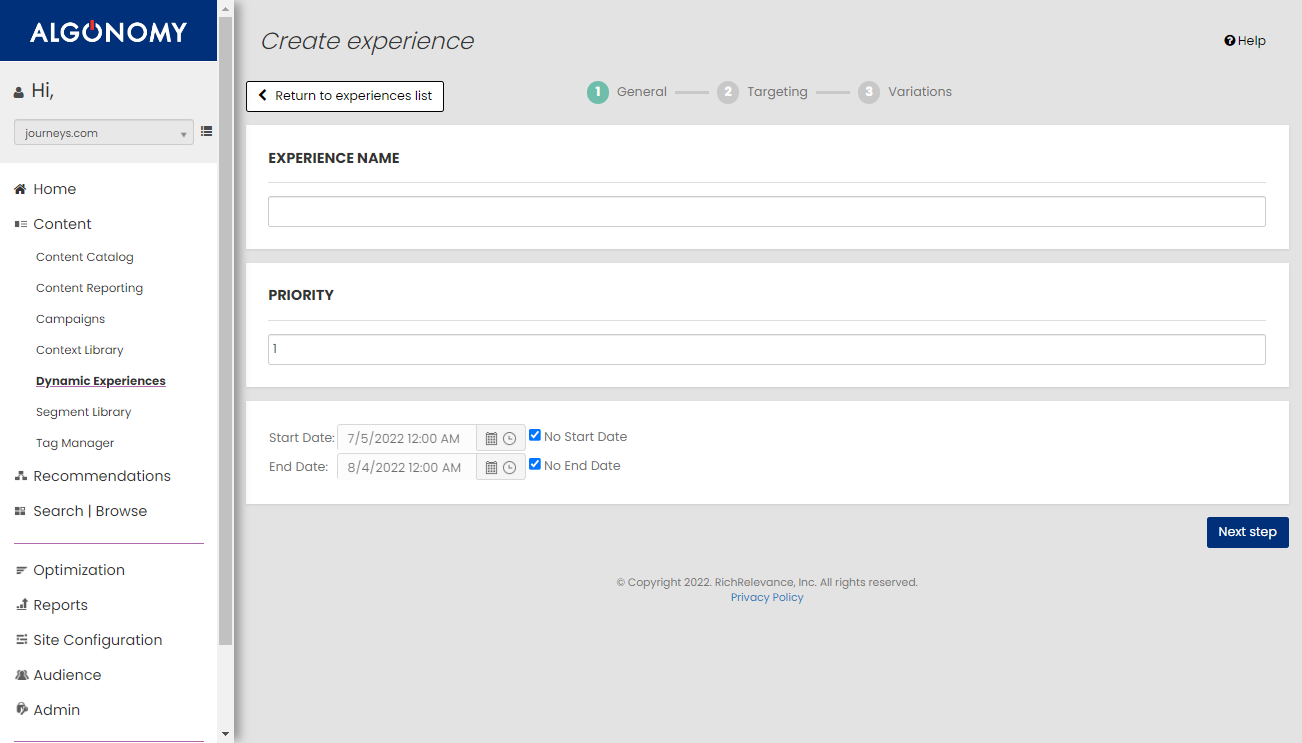
General: Set up the basic details such as experience name, priority, start date, and end date.
-
Targeting: Define the target segments and contexts for the social proof message.
-
Variations: Create and manage multiple variations, specifying how they will be served to the audience.
-
Perform the following steps to specify the general details about the dynamic experience to be created:
-
On the Create experience page, specify the following:
-
EXPERIENCE NAME: Specify the name of the dynamic experience to be created for social proof. Remember this experience name for future reference to identify and edit the experience whenever required.
-
PRIORITY: Specify the priority. It is used to determine which experience should execute when multiple experiences match the context.
-
Start Date: Specify the start date.
-
End Date: Specify the end date.
-
(Optional) Select the No Start Date and No End Date checkboxes for indefinite experiences.
-
-
Click Next step.
Perform the following steps to choose the segments and contexts:
-
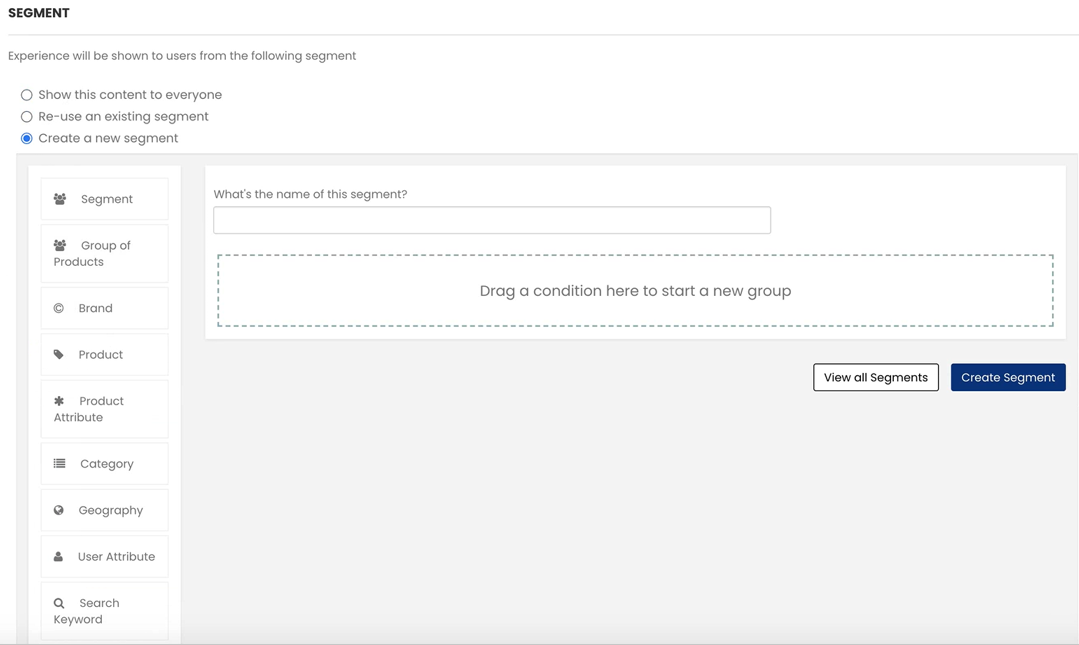
Choose the segment. You can perform the following to define the segment:

-
Show this content to everyone: The experience is visible for all the users on the client site.
-
Re-use an existing segment: The custom target segment is defined by choosing from the available list of segments.
-
Create a new segment: You can create a new segment based on the requirement. Provide a name for the segment and choose the target audience by drag and drop from the condition list.
-
-
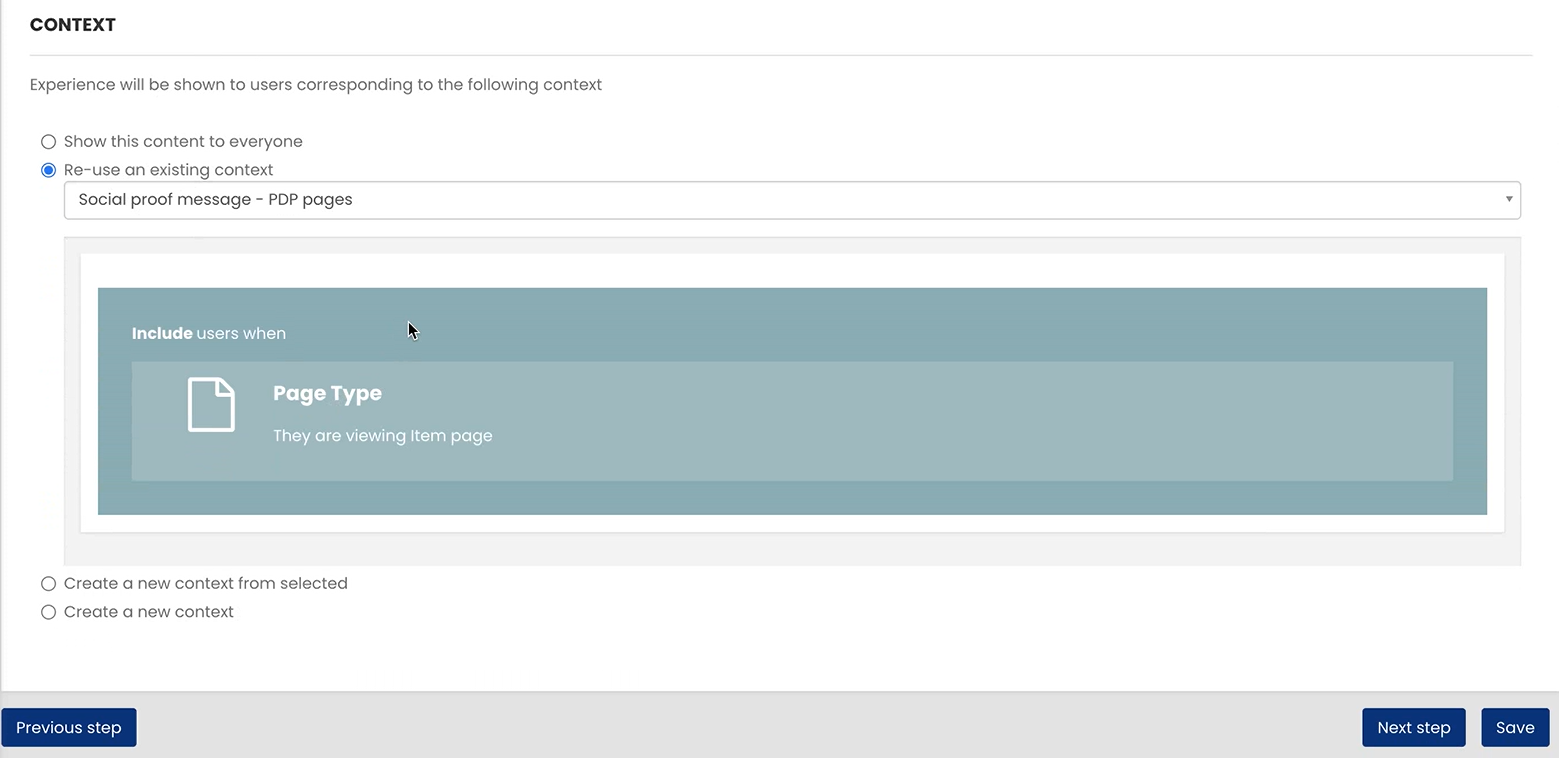
Choose the context, which will further define the context.

-
Context must include the page type (Item Page/List Page/Cart Page) based on where you want to display the social proof message.
-
You can add additional criteria along with page type to restrict the social proof message to certain categories or brands of products etc.
-
You can perform the following to define the context:
-
Show this content to everyone: The experience is visible for all the users on the client site based on the context where it should be shown on the webpage.
-
Re-use an existing context: The custom target context is defined by choosing from the available list of contexts. For re-using an existing context, ensure the conditions of content are specified as required.
-
Create a new context from selected: This option appears only in the edit experience environment to modify the selected segment, and this option does not appear during the creation of new experience.
-
Create a new context: You can create a new context based on the requirement. Provide the name of the context and choose the target audience by drag and drop from the condition list.
-
-
-
Click Save.
-
Click Next step.
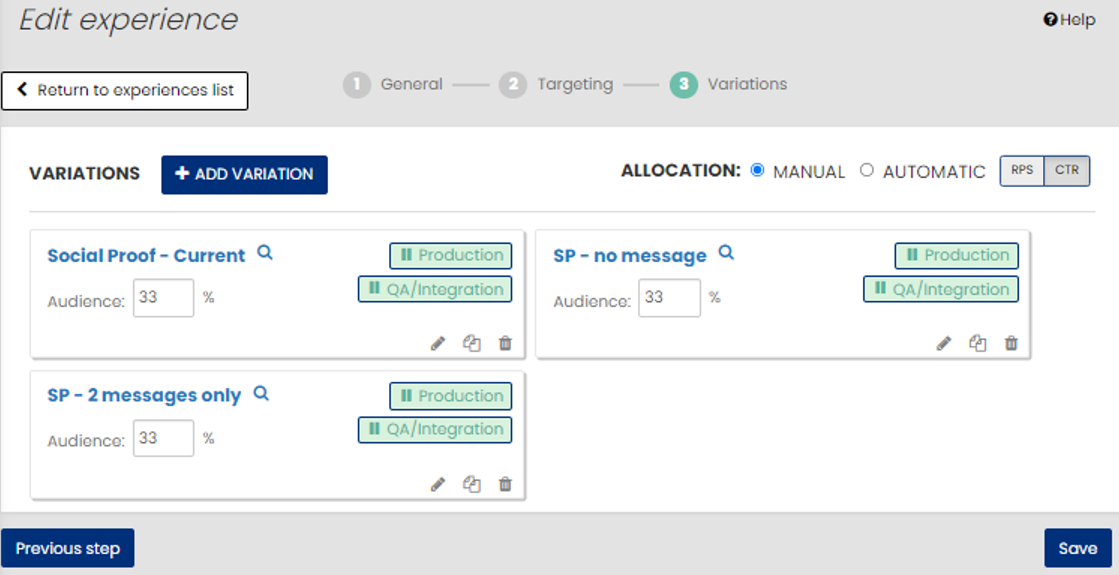
With Dynamic Experiences, you can create multiple variations and choose how you want to have them served, either based on the performance or by the traffic split defined as the percent of audience. The different variations are tested in the Production and QA/Integration environment with specified percentage of audience for each variation to check the performance. The variations are measured on different channels and metrics for the social proof experience.
Note: If any mentioned feature is not available in the Social Proof template, it is recommended to create a new variation to see the newly added features.
Selecting the Allocation option to Manual or Automatic is defined as:
-
MANUAL: Impressions are distributed according to the percentage of audience in the variation settings. Social Proof works only with Manual allocation.
-
AUTOMATIC: Impressions are distributed by Experience Optimizer to get the maximum performance for the optimization metric. The following two target performance metrics are available:
-
RPS (Revenue Per Session)
-
CTR (Click Through Rate)
-
Note: Social Proof does not support the performance optimization settings, hence Automatic allocation is not applicable for Social Proof.
-
Perform the following actions to manage the variations:

-
Click +ADD VARIATION to create a new variation.
-
Click
 to edit the variation.
 -
Click
 to copy the experience for applying in the new variation.
 -
Click
 to delete the variation.
Note: Select the QA/Integration or Production checkboxes accordingly to set the variations in QA/Integration or Production environment.
-
-
Click Save.
-
Click Next step.
For more details about creating variations, see Creating Variations.